How to change the VSCode Status Bar Color
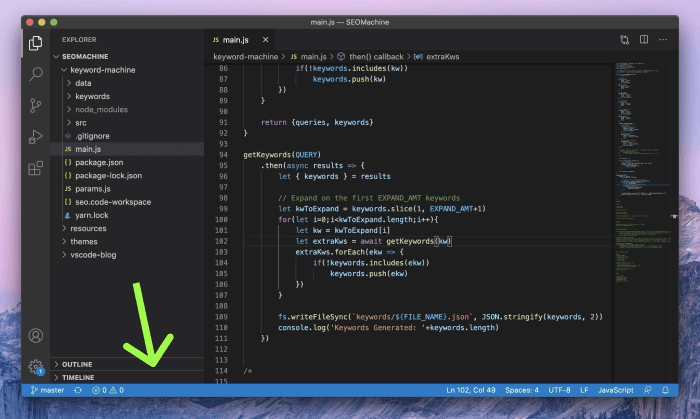
The VS Code bottom bar color is bright blue and purple by default. This quick guide will show you exactly how to change the status bar color to your liking.

Bright purple and bright blue. The default status bar color in VS Code is bit overbearing. At one point I even disabled the status bar completely to get rid of the bright, colorful distraction.
To be clear, I actually think the bar looks nice from a purely aesthetic perspective. It certainly adds to the sleek branding and crisp color scheme of the editor.
From a functional perspective though, when I'm programming I like to cut out all distraction and focus solely on the code. If you're anything like me, you probably want to make the status bar a much less jarring color. Perhaps a gray, or even a darker blue.
Or, maybe you just want to spice up the editor's theme a bit, and personalize it to make it your own. That works too.
Well, there's good news.
You can change the color of the status bar very easily in VS Code, and I'm going to show you exactly how to do it. There's only a few steps you have to take, and I'll walk you through them.
Change the VSCode Bottom Bar Color
Changing the color involves picking a color and updating a setting in your "settings.json" file called "workbench.colorCustomizations." You can also customize the status bar on a per-workspace basis. This involves editing your .code-workspace file's "settings" field in the same way you would "settings.json."
1. Choose a color
The first step is to figure out what color you want to update the bar to. A helpful tool to use is Google's color picker. The color should be a standard hex code. (E.g. Black is "#000000") The google color picker automatically highlights the hex code for you, so just copy it.

2. Find and open your "settings.json" file
The next step is to open your settings file in VS Code. The simplest way to do this is via the Command Palette.
To open the command palette, use the keyboard shortcut for your OS:
- Windows: Ctrl + Shift + P
- MacOS: Command + Shift + P
3. Enter "Open User Settings (JSON)"

Once you do this, you should see a JSON file that holds all of your custom settings.
4. Add the "workbench.colorCustomizations" setting to the file.
Here is where you can override the default status bar settings. Simply copy and paste the snippet below into your "settings.json" file, and replace the hex codes with your own chosen colors.
"workbench.colorCustomizations": {
    "statusBar.background" : "#1A1A1A",
    "statusBar.noFolderBackground" : "#212121",
    "statusBar.debuggingBackground": "#263238"
}
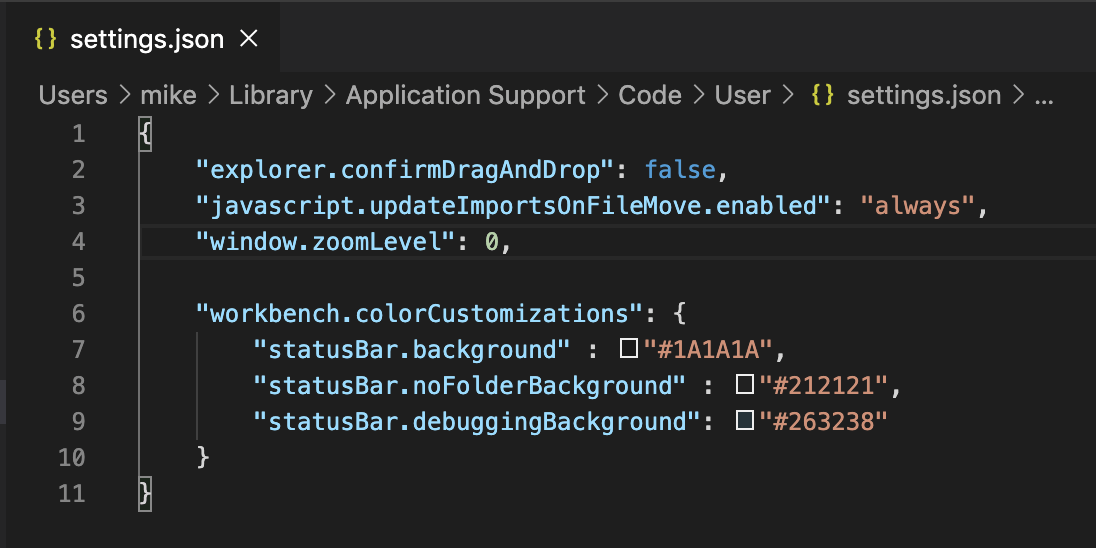
Once you've added the settings, it should look similar to this:

Note: make sure to add a comma after the prior setting to ensure it is valid JSON. In my case, the previous setting was ""window.zoomLevel," but in your case it may be something different.
These are the main settings that you'll need in order to restyle the status bar, but there are actually a bunch of theme settings you can tinker with.
5. Save the file
After saving the file, you should see the status bar's color change immediately. Congrats! Now, mess around with the colors until you are happy with the result.
Change the Status Bar Color for a Workspace
As mentioned, you can achieve the same result on a per-workspace basis. This means that you can make the status bar color specific to your current workspace only. (E.g. a ".code-workspace" file) This may be helpful if you want to quickly distinguish between different VS Code project windows.
To do this, simply open the ".code-workspace" file you want to customize, and place the "workbench.colorCustomizations" setting inside of the workspace's "settings" object, as described above.
- Tip: to quickly open your workspace's file, open the Command Palette and enter "Open Workspace Settings (JSON)"
- Tip 2: If the workspace does not yet have a "settings" object, create one.
In the end, it should look something like this:

Change the Bottom Bar Color for a Theme
If for some reason you tend to swap between multiple themes, it may make sense to scope your custom color settings under the theme's settings only. This way, once you switch back to a different theme, the status bar is unchanged.
In order to do this, instead of adding the "statusBar." settings directly under the "workbench.colorCustomizations" setting, simply add a property for the name of your theme, and then add the "statusBar" settings under that property. Here is an example of what I'm talking about:
{
	"workbench.colorCustomizations": {
		"Your Theme's Name": {
			"statusBar.background" : "#1A1A1A",
			...
		}
	}
}
There you have it. VS Code is the most customizable editor I've ever used. It's awesome.
Happy vs-coding!
🔥 P.S. I'm building UXCanvas.ai
UX Canvas is an AI-Powered UI/UX Design Agent. It's like ChatGPT but specifically for rapidly prototyping UI/UX designs.
Try it for free and let me know what you think!

